Promo Schedule Enhancements
Enhanced the Promo Schedule console to resolve an issue where the console was
getting locked up with the following message when there were multiple open consoles.f

2. Added an option to delete Promo Schedule images
Multiple open sessions
Scenarios that used to lock the console
● Lindsay opens Promo Schedule console while Jessie is also connected
● Bill opens Promo Schedule console in multiple PCs at the same time
● Sarah opens Promo Schedule console in multiple Chrome browser instance in the same PC
Example: Lindsay and Jessie connecting to the Promo Schedule console at the same time.
Jessie was the first one to open the console. She therefore has read/write permissions. All the control buttons are shown.

Lindsay opens the console after Jessie
She gets an alert message stating that Jessie is already connected to the console.
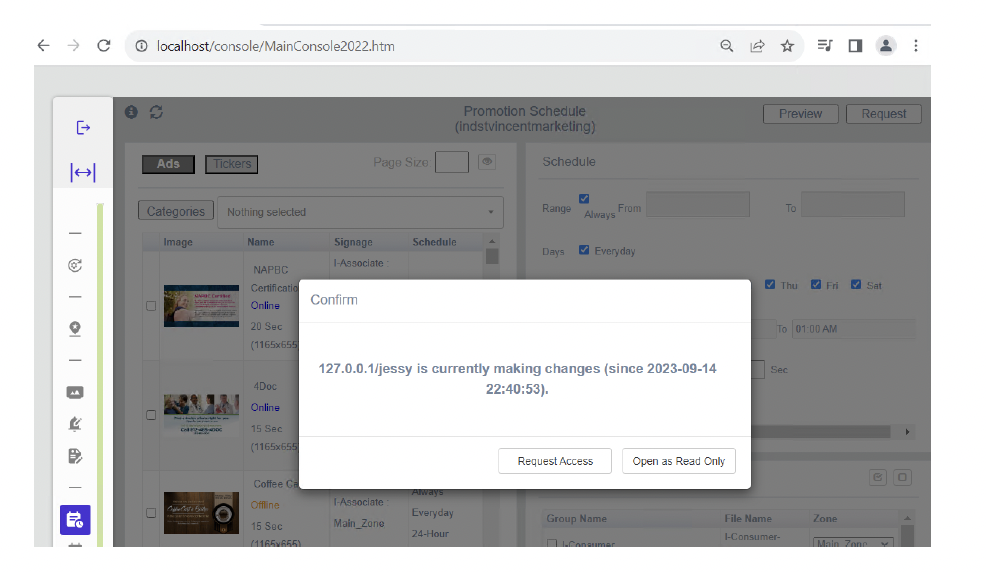
● Lindsay can request read/write access from Jessie by selecting “Request Access”.
● Jessie can accept or refuse the request.
● However, if Jessie doesn’t respond in 30 sec, Lindsay will automatically be granted the read/write permission.
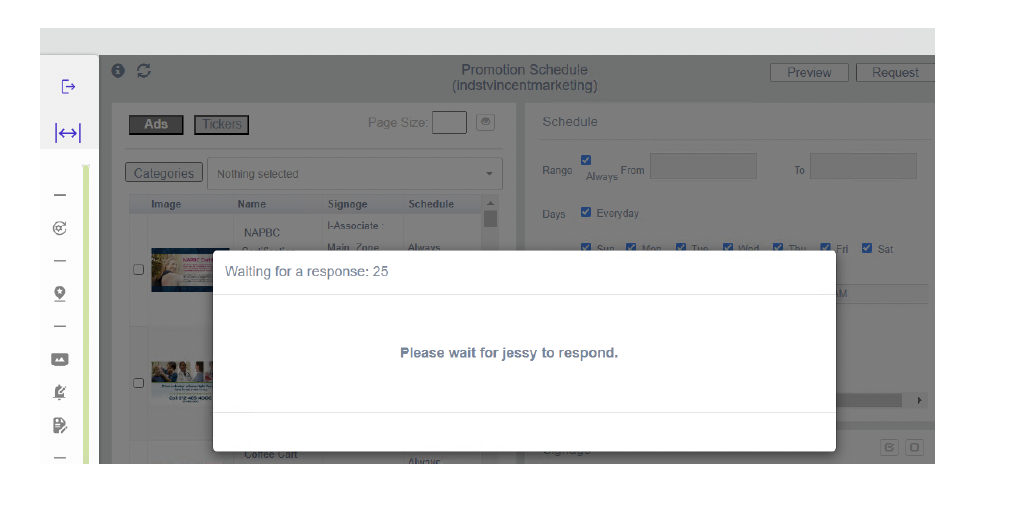
Lindsay’s browser after selecting “Request Access”
The browser page shows the message “Please wait for Jessie to respond”.
Jessie’s browser showing the access request from Lindsay

Jessie’s browser after Lindsay has gotten the read/write permission.
The console will change to read-only mode. The “Save” option at the top right will be replaced with “Request”. The control buttons will be removed except for the image preview one. Jessie can re-request access from Lindsay by pressing the “Request” button.

Removing Promo Schedule Ads and deleting image files
Remove the “Ad” from the schedule and then delete it’s corresponding image file
1. Getting the name of the image file from the Ad.
● Checkmark the Ad
● Select Edit Ads

● The name is shown under “Media”
● Close the Edit Ad window

2. Checkmark the Ad and then click on the Remove Ad option

3. Click on Save

4. To delete any image file, click on the Manage Files option.

5. Expand the folder category (site ID)

6. Select the image file(s) to be deleted.
7. Click on the drop down menu and select Delete File

8. Close the Manage Files window
