Vytio Signage System Guide
Overview
This document describes how to manage pictures in the signage system with multiple segments and zones.
Login
1. Bring up any browser. Launch the IPTV Console (http://<serverip>/console).

Creating a signage template
Opening a signage file for editing
1. After logging in, click on the Signage Console link. A folder with the site’s name will be shown.

2. Click on the folder with the site name.

3. Click on the name of the signage file (In this example, the file is called SunshingSignage8).

The filename will be shown as *-sign.xml in the “File Name” field.
Click on OK
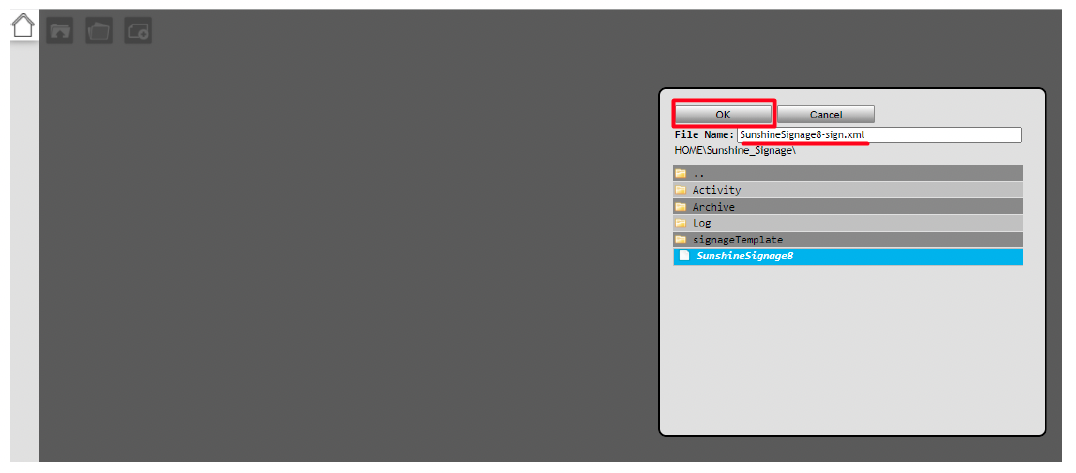
4. The signage file layout will be shown.


Import a new picture
1. Open the signage file (Refer to the section, “Opening a signage file for editing”)
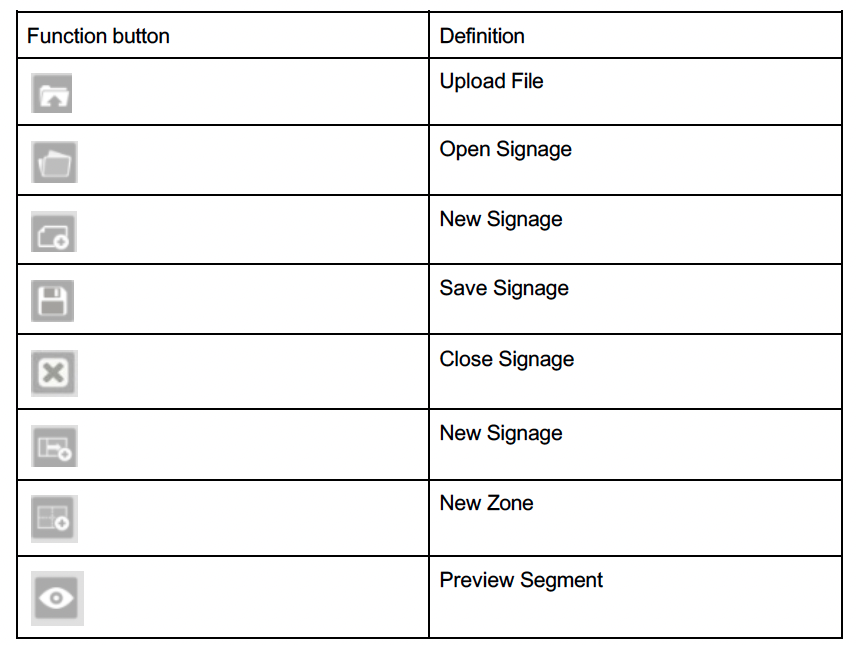
2. Click on Upload File.

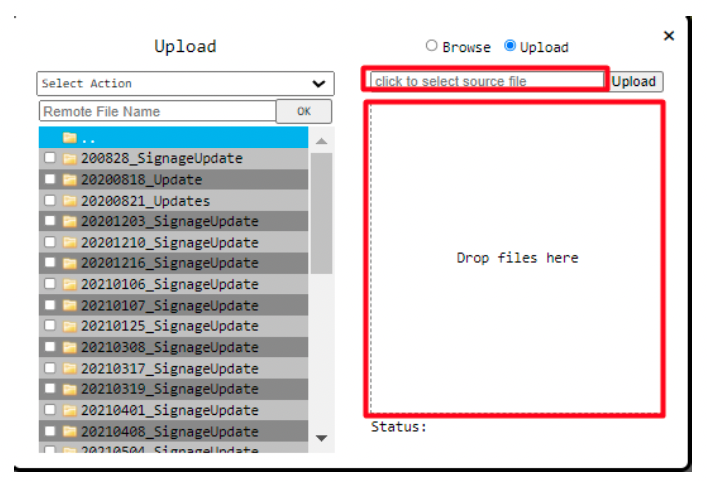
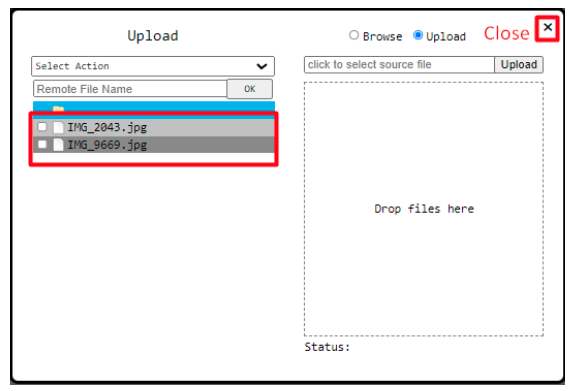
The upload widget will be as shown.

3. On the left pane, expand the folder tree to select the folder for placing the new pictures.
Note:
In this example “Signage Updates” is the folder that is going to be used.

Click on the folder “Signage Updates”. In this example, there are more subfolders.

Note:
If new folders are to be added, click on the “Select Action” field. An “Add Folder” option will be shown.

4. Click on the field “click to select source file”. Browse for the images to be uploaded from your PC. Or, drag and drop them into the “drop files here” box.
5. After selecting the files, click on Upload.
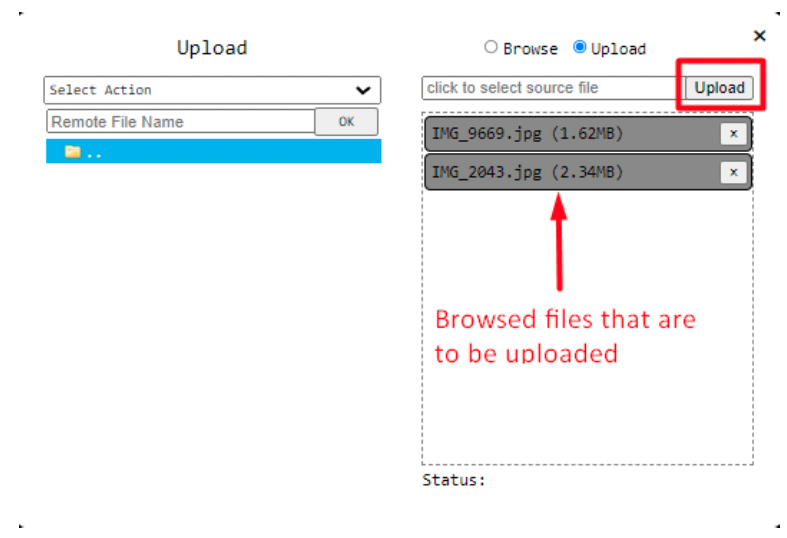
6. Click OK to finish.

The uploaded pictures will be shown in the respective upload folder. Close the window when done.
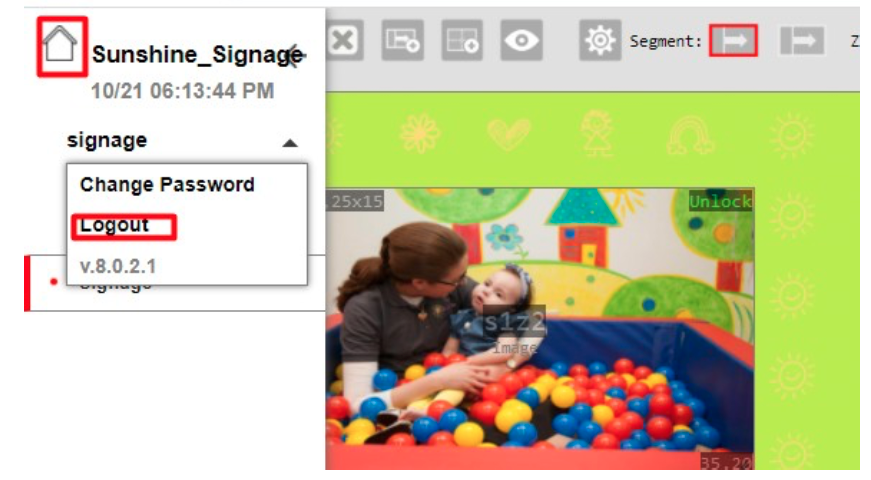
Logout of the console when done.
Add a new picture
1. Open the signage file (Refer to the section, “Opening a signage file for editing”).
2. Select the segment that is to be edited. Then click on the zone name.
In our example, the signage has two segments. The first segment has five zones and the second one has a single zone.
Segment 1:
s1z1 is the large zone with a greenish background.
s1z2, s1z3, sqz4, s1z5 are four picture zones.

Segment 2:
There is a single zone in this segment (s2z1).

Select “Segment 1”. Then click on s1z2 to open the second zone for editing.

3. A list of the images assigned to the selected zone will be shown. In this example, zone s1z1 has five pictures. Each picture has been set to be shown for 5 sec before rotating to the next picture.


4. Click on Add to add a new image.

5. Browse for the picture then click on OK.


6. The new image will be shown at the bottom of the list.
● To reposition the play order of an image, click and hold the section showing the picture path and drag-and-drop it up/down the list of pictures.
● Change the play time of the picture.

7. Click OK when done.

8. Click Save.

9. Click on OK.

10. Click on OK to finish.

11. Logout from the console.
Setting the playtime of a signage segment
A signage segment could have one or more picture zones. Each of the zones could have
multiple pictures set to play for different time periods. The segment time has to be set to be at
least as long as the total playtime of the pictures in the zone with the longest play time.
In our example, segment 1 has been set to play for 25 sec and segment 2 for 730 sec.
Segment 1 has four picture zones. Each zone has the same number of pictures (5 pictures) and
all have been set to play for the same time period (5 sec). The total playtime before looping
through the pictures is 5 pictures x 5 sec each (25 sec). Segment 1 is therefore set to 25 sec.
If the segment time is set to 50 sec, the pictures will loop one time.
1. Open the signage file (Refer to the section, “Opening a signage file for editing”).
2. Select the segment that is to be edited. Click on Segment Setting. Change the segment
playtime.
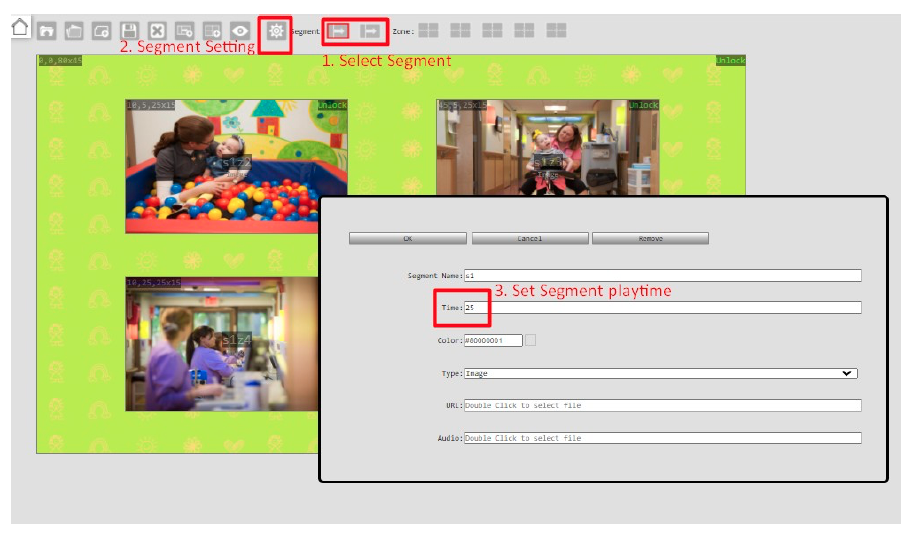
3. Click on OK.

