Vytio IPTV Menu Editor Guide
1. Introduction
The InfoValue IPTV Menu Editor is for editing The IPTV Poral Menu content.
This guide provides the following information
• How to access Menu Editor in Section 2,
• File open, save and close operations in Section 3,
• How to edit the content of a Menu Node in Section 4,
• How to manage Menu Nodes, e.g. add or delete a Menu Node, in Section 5
• How to push updated Portal Menu Content to IPTV endpoints in Section 6
2. Access Menu Editor
To access Menu Editor:
1. Navigate a web browser to http://<server_ip>/console, where <server_ip> is the IP address of the IPTV server
2. Enter Account, Password and Site information
3. Click the Login button
4. Select “Menu Editor” from the menu on the left side

3. Open, Save and Close Portal Menu Data File
Portal Menu Content is captured in the Portal Menu Data File (or the PD File).
In most situations the PD is automatically opened and loaded when Menu Editor starts. The PD file, such as “SandalsSBD2-pd.xml”, is shown on the top left corner of the screen.
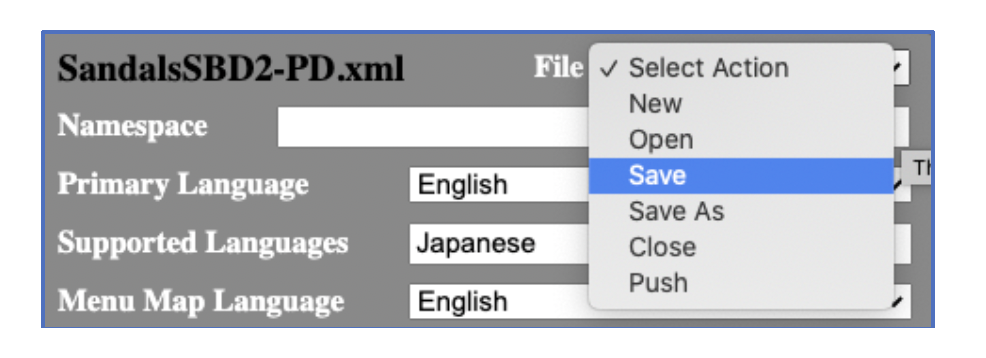
When it is necessary to explicitly open a PD file, click the “File” dropdown, select “Open” and use the dialog box to select the intended PD file.
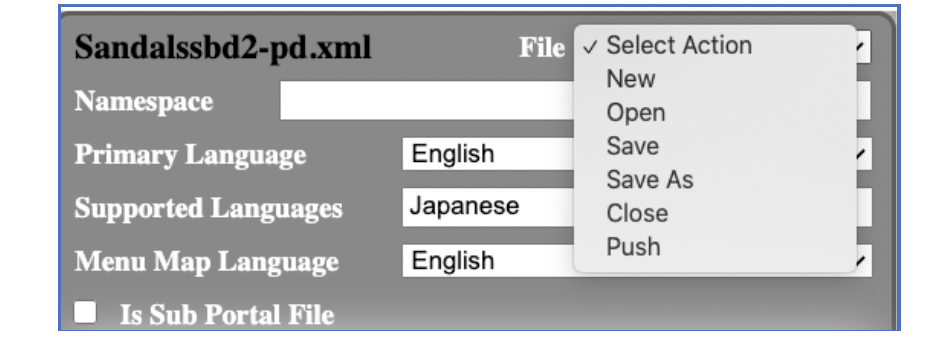
To save the changes to the PD file, click the “File” dropdown and select “Save”. It is critical to save all changes to a PD file before closing the PD file or exiting the Menu Editor session. Otherwise all changes will be lost.
To close the opened PD file, click the “File” dropdown and select “Close”. It is a good practice to close a PD file before leaving Menu Editor to prevent blocking the PD file from further editing.
A PD file can be edited by only one instance of Menu Editor at a time. When multiple instances of Menu Editor open the same PD file, the PD file is editable to only one instance and read-only to the rest.
Menu Editor which can edit a PD file automatically close the file after 15 minutes of no editing activity. This auto timeout mechanism is needed to prevent an instance of Menu Editor holding on a PD file indefinitely.
4. Edit A Menu Node
To edit the content of a Menu Node, click the Menu Node on the Menu Map on the left pane to select the Menu Node.
The parts of a Menu Node that often need editing include:
• The icon or the image
• The name
• The slideshow
• The video
• The text information

4.1 Edit Icon or Image
To edit the icon or the image,
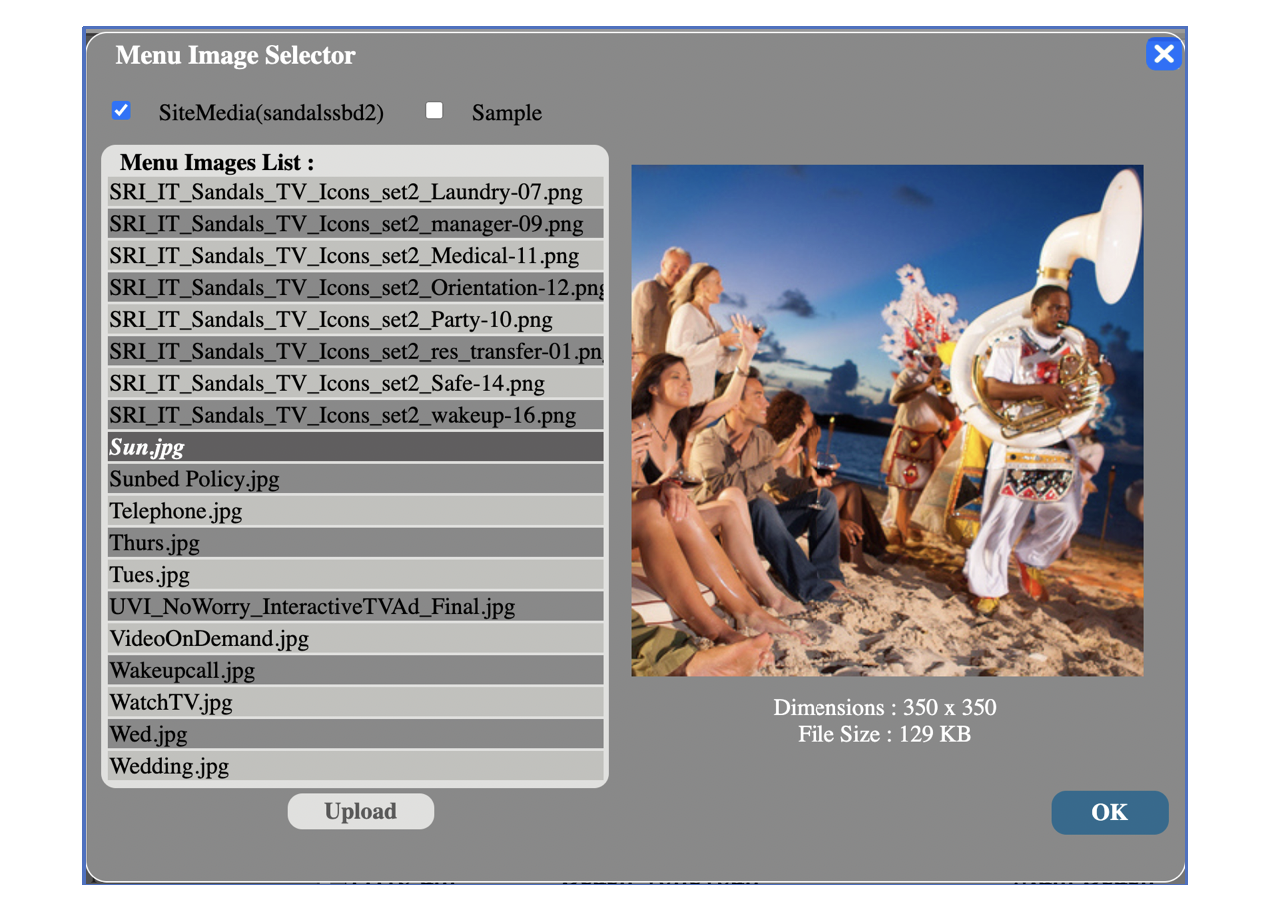
1. Click the icon or the image and see the “Menu Icon Selector” or the “Menu Image Selector” dialog
2. Browse the image files on the server (more details later)
3. Highlight the intended image and click “OK” button
To browse image files on the server
• Click on an image and see its content and dimension on the preview pane on the right side, or
• Use keyboard up / down keys to quickly browse the image files and see their content and dimension on the preview pane
The parent folder is represented by “..” and subfolders are represented with a “+” prefix.
In addition to the folders and files of the specific property, the system provides a set of folders and files organized under “Sample”. To browse and select images from “Sample”, click-select “Sample” instead of the specific property.
If image files need to be uploaded to the server to be used, click the “Upload” button in “Menu Icon Selector” or “Menu Image Selector” dialog and perform the following:
• Click the “Choose File” button to select a local file. Modify the name for the file on the server if necessary.

• Click the “Select a folder” dropdown to specify the intended folder on the server.
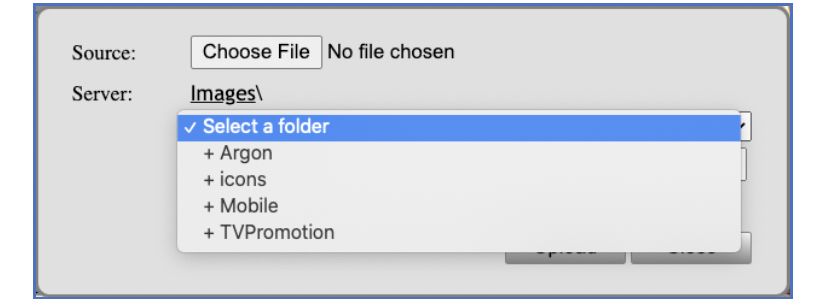
• Click the “Upload” button.
It is critical to use image files of appropriate resolutions and file size to ensure good system performance. Specifically,
• The compatible image file formats are “JPEG”, “PNG” and “JIFF”
• The images for full screen display should not exceed 1920x1080 (or the 1080-HD) resolution.
• Images with resolutions higher than 1080-HD are shown poorly on most IPTV endpoints.
• The images for full screen display should have file sizes between 500KB and 1MB.
• Large size image files slow down the performance of the popular IPTV endpoints.
4.2 Edit Name
The name of a Menu Node is also the title of the Menu Node. To edit the name, click the “Name” input field and edit the name.
4.3 Edit Slideshow
There are three parts in a slideshow: image list, audio and Label.
To edit one of the parts, click the field next to “Slide Show” and select the part, such as the screenshot below for editing the image list.

4.3.1 Edit Slideshow Image List
To edit the image list, click the field next to “Slide Show” and select the “Image : …” and see the dialog below.

The images, if any, in the image list are shown in a sequence of tiles, containing
• The image file name
• The duration of showing (in seconds)
• An “eye” button for previewing the image
• An “edit” button for the advanced editing, which is often not needed
• An “X” button for removing the image from the list
To add an image to the list, click the “Add File” button and use the file dialog to browse and select an image file on the server.
It is critical to use image files of appropriate resolutions and file size to ensure good system performance. Specifically,
• The compatible image file formats are “JPEG”, “PNG” and “JIFF”
• The images for full screen display should not exceed 1920x1080 (or the 1080-HD) resolution.
• Images with resolutions higher than 1080-HD are shown poorly on most IPTV endpoints.
• The images for full screen display should have file sizes between 500KB and 1MB.
• Large size image files slow down the performance of the popular IPTV endpoints.
The sequence of the tiles is the sequence that the images are shown. To change the sequence, drag a tile and drop it into another position.
To set the display mode, click the “Display” dropdown to select “Normal” or “Stretch”. With the “Normal” mode, the entire image shown; wih the “Stretch” mode, an image is shown to fill up the screen width, even if only a part of an image can be shown
With the “Normal” mode, the images can be set in the “Loop” arrangement, with which images are displayed automatically in loops. To enable the “Loop” arrangement, check-select the “Loop” checkbox.
To upload a local image to the server, click the “Upload Image” button and follow the dialog to
• Select a local image file,
• Specify the name for the image file on the server
• Select the folder on the server where the image file will be uploaded to
4.3.2 Edit Slideshow Audio
To edit the image list, click the field next to “Slide Show” and select the “Audio : …” and see the dialog below.

The audio files, if any, are shown in a sequence of tiles, containing
• The audio file name
• The length of the audio file (in seconds)
• An “eye” button for play the audio file
• An “edit” button for the advanced editing, which is often not needed
• An “X” button for removing the audio file from the list
To add an audio file to the list, click the “Add File” button and use the file dialog to browse and select an audio file on the server.
The audio file format that is compatible with most IPTV endpoint devices is “mp3”.
The sequence of the tiles is the sequence that the audio files are played. To change the sequence, drag a tile and drop it into another position.
The audio settings can be temporary suspended without deleting them. To suspend the audio settings, click the “Status” dropdown and select “No”. To enable the suspended audio settings, click the “Status” dropdown and select “Yes”.
If there are more than one audio file in the settings, check-select the “Loop” checkbox to automatically loop through all audio files.
To upload a local audio file to the server, click the “Upload Audio” button and follow the dialog
to
• Select a local audio file,
• Specify the name for the audio file on the server
• Select the folder on the server where the audio file will be uploaded to
4.3.3 Edit Slideshow Label
To edit the slideshow label, click the field next to “Slide Show” and select the “Label : …” and see the dialog below.
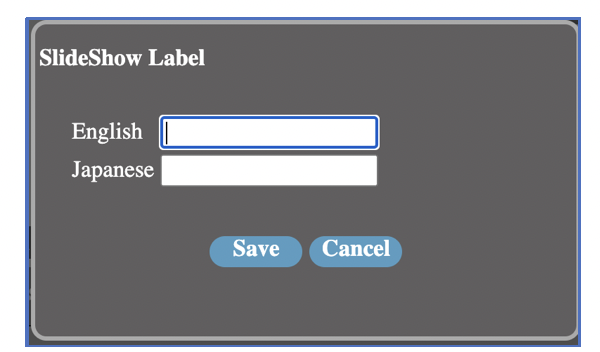
Enter the label in the input fields of the relevant languages and click “Save” button.
The slideshow label is for customizing the hint on the Portal Menu interface for indicating that a Menu Node has slideshow. The default hint is “Press OK for Multimedia”. With an explicit label setting, such as “Dining Menu”, the hint becomes “Press OK for Dining Menu”.
4.4 Edit Video
To add, change or delete the info video of the menu node, click the field next to “Video File” and see the dialog below.

To delete the video, have “None” in the “Select Video File” field and click the “Set” button.
To add or modify the video, click the “Select Video file” dropdown to select a file or a folder.
Repeat the process until the intended video file is specified. Click the “Set” button.
The “Sample” provides some videos that can be selected as well. Check-select “Sample” and repeat the steps above.
The ideal format for video files is “mp4” in the most situations.
If a video is not a file on the server but can be specified as an URL, check-select “URL”, enter the full URL and click the “Set” button.

4.5 Edit Text Information
To edit text information, click the “Edit” link on the upper right corner of the text area of a language and see the text editor.
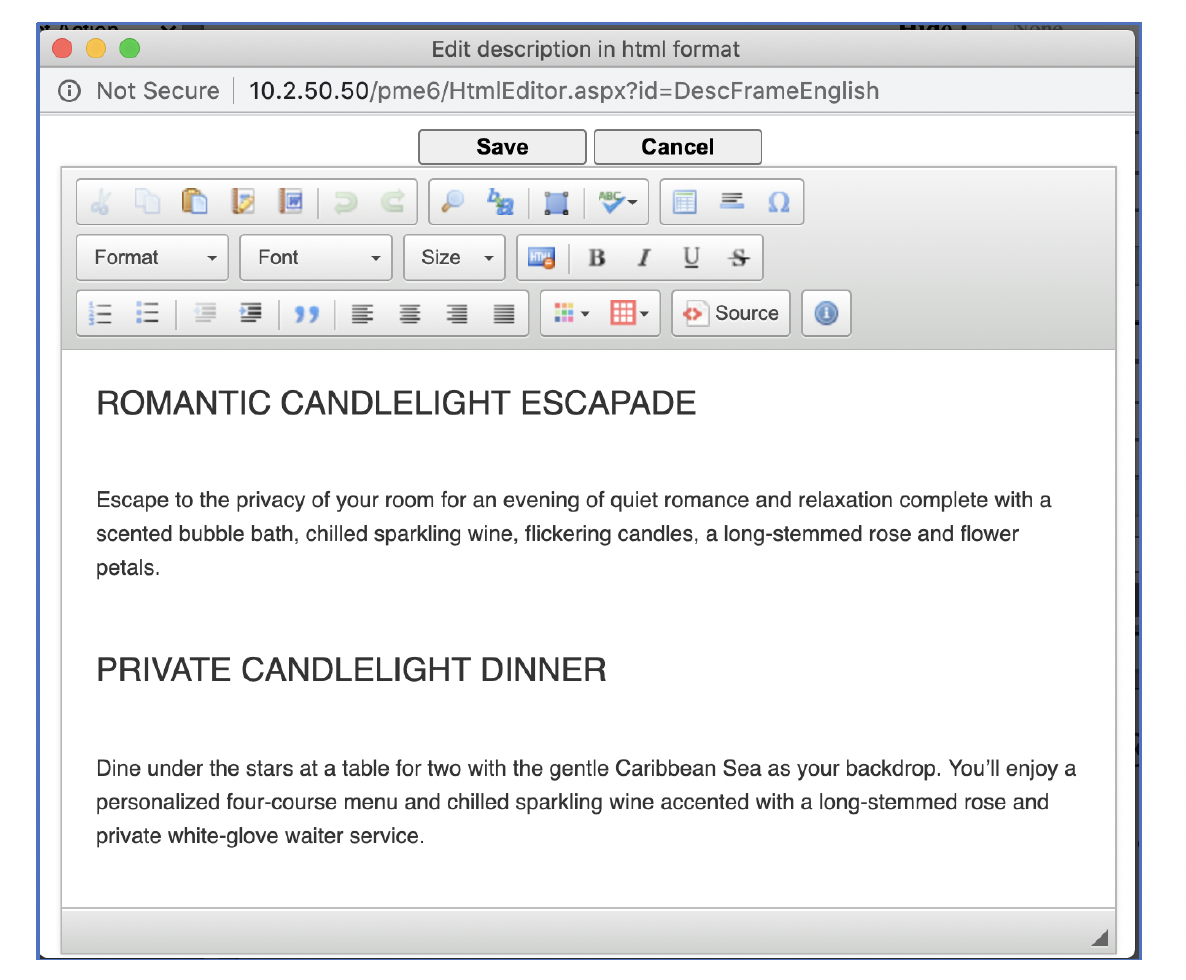
Edit the text info in the editor and click the “Save” button to save the changes of the text information and exit the editor.
For a non-English language, it is necessary to enter the Menu Node name in the “Name” input field in addition to entering text information.
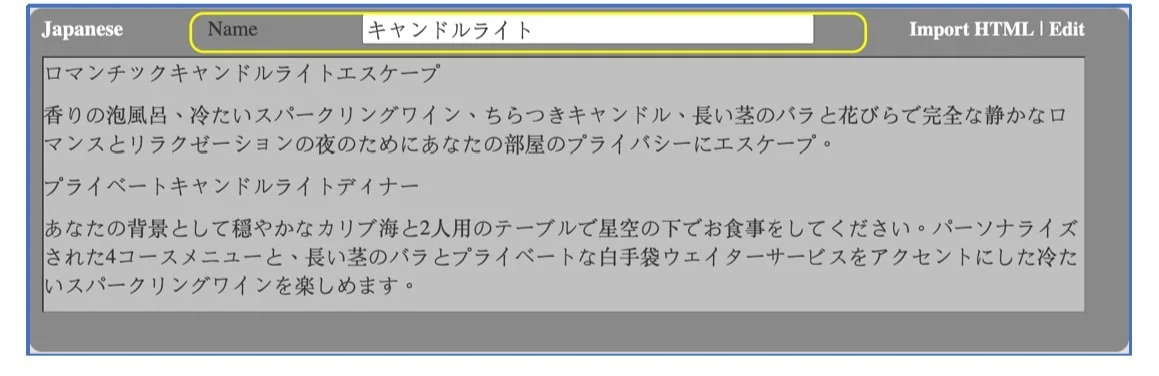
In most situations English is the primary language. When the name or the text information of a non-English language is missing, the Portal Menu interface shows the name or the text information of the English language.
Text information can be organized in multiple “Child Pages” such as below.

To manage Child Pages, use the “Child Page Control Bar”.

• Click the “+” button to add a Child Page
• Click the “-“ button to delete a Child Page
• Click the “left” or “right” button to navigate the Child Pages
Entering text information in a Child Page is the same process as above.
4.6 Save Changes!
It is critical to click the “Save Node” button to save all changes to the Menu Node before leaving
the Menu Node. Otherwise changes are not saved and essentially lost.
The “Save Node” button is on the top right corner of the screen.

It is important to note that all changes to Menu Nodes must be saved to the PD file before closing the PD file or exiting Menu Editor session. To save the changes to the PD file, click the “File” dropdown on the top left screen and select “Save”.
5. Manage Menu Nodes
Menu Nodes are shown in the Menu Map on the left pane. To manage Menu Nodes, use the Menu Node Control Bar above the Menu Map to
• Add a Menu Node
• Delete a Menu Node
• Move up the position of a Menu Node
• Move down the position of a Menu Node
• Cut a Menu node
• Copy a Menu Node
• Paste a Menu Node
5.1 Add A Menu Node
To add a Menu Node, say B, as a child node of an intended parent node, say A
1. Click and highlight the Menu Node A
2. Click the “+” button in the Menu Node Control Bar
3. A new Menu Node is added as a child node of Menu Node A
4. Click the “Name” field on the right pane and change it to B
5. Click the “Save Node”
The new Menu Node with the intended name is created after these steps. To edit the content of the new Menu Node, follow the steps in Section 4, “Edit A Menu Node”.
5.2 Delete A Menu Node
To delete a Menu Node is to remove the Menu Node permanently.
To delete a Menu Node, e.g. Menu Node D
1. Click and highlight the intended Menu Node D
2. Click the “-“ button in the Menu Node Control Bar
5.3 Move A Menu Node To Under Another Parent Menu Node
To move a Menu Node to under a different Parent Menu Node,
1. Click and highlight the Menu Node to be moved
2. Click the “scissors“ button in the Menu Node Control Bar to cut the Menu Node
3. Click and highlight the new parent Menu Node
4. Click the “paste” button
5.4 Move The Position Of A Menu Node Under The Same Parent Menu Node
To move the position of a Menu Node under the same parent Menu Node,
1. Click and highlight the Menu Node to be moved
2. Click the “up” or “down” buttons in the Menu Node Control Bar to move up or down the position of the Menu Node
6 Push Portal Menu Content
An IPTV endpoint loads the Portal Menu content from the server when it boots up and uses the cached version until the next reboot.
To inform IPTV endpoints to get the updated Portal Menu content before their next reboots, click the “File” dropdown and select “Push”.

The server will send commands to inform all IPTV endpoints that there are changes in Portal Menu content. After receiving such a command, an IPTV endpoint refreshes its cached version of Portal Menu content when
1. There is no user activity for a period of times, such as 15 minutes, and the endpoint is not on TV channel, movie, Internet Radio, etc., or
2. During the pre-specified “odd hours”, such as 3-5am, if #1 conditions are never satisfied
It is a good practice to use the push command when the modification of Portal Menu content reaches a meaningful stage, as opposed to sending a push after every change. Having said that there is no really concern in sending multiple push commands in a short period of time.